

At my day (night) job I can often be found at lunch sitting in the breakroom drawing faces. Random faces, faces for character designs ect ect. Often i'm told that it's difficult to draw faces and heads from co-workers and friends who watch, and to be honest if you don't have a basic idea of what you're doing it really is. So I decided this will be the first thing I cover in my quest to help you, the reader become a better artist.
The first thing i'm going to tell you is very important. Every artist basically says this, and it holds true in a lot of ways; You have to observe things in life in order to better understand how they will appear on the page. Grab some images of faces through Google search, grab a mirror and just stare at your own face. You have to familiarize yourself with what you're drawing in order to understand how to translate it onto paper. Take a few minutes to observe your own face in the mirror, every curve every angle. the basic structure notice that if you really look you can break that down into shapes. Now let's draw those shapes that will be used to make a face on paper.
Beginner's Method: Familiarity with shapes.
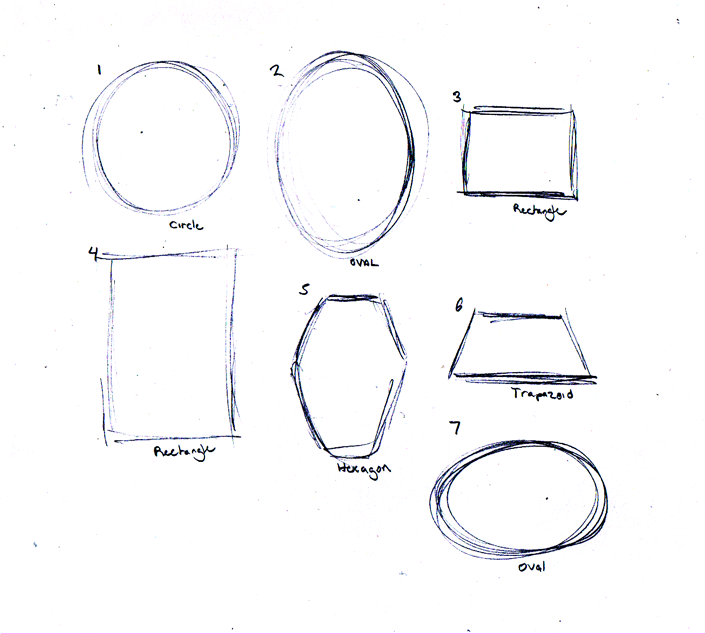
- Circle
- Oval (upright)
- Rectangle (sideset)
- Rectangle (upright)
- Hexagon
- Trapezoid
- Oval (sideset)
The oval is the basic shape used for heads, while circles are mainly used for youthful faces. You can even combine both to create elongated or more shapely faces like for females. Rectangles are good for square jawed guys and rough characters. While Hexagons and Trapezoids are good for creating more interesting shaped heads. Below is an example drawing I did to better explain.


Now for the sake of covering different basic styles I'll be showing you multiple techniques. You can pick and choose which ones work for you, but I'm just giving you some variety. I usually blend techniques as i see fit, because I believe that there is more than one way to skin this theoretical cat. Not that I believe in skinning cats...eh you know what I mean..
This is the most basic of basic styles.

You start off with the Oval
Draw a center line through the oval to give a sense of space between the eyes and to help you to frame the nose.
Draw additional lines to frame where the eyes will be and where the nose will be in position to them.
Eventually, you'll be able to rough out the mouth and start to add shape to the facial features while providing hair and other details. I always draw the ears parallel to the eyes because that's how mine are, but I also have small ears for my head (don't laugh). The larger the ears the more they take up the face.
Homework: Try to at least do ten heads in the basic style in order to familiarize yourself with the technique. As you begin to draw them again and again you'll build muscle memory and will be able to draw faces without the use of the guides. Try it!
Next time I'll show you my method for drawing heads, as well as some tips on drawing hair.
See you next time
No comments:
Post a Comment